-
Caring for Sleeping Mats
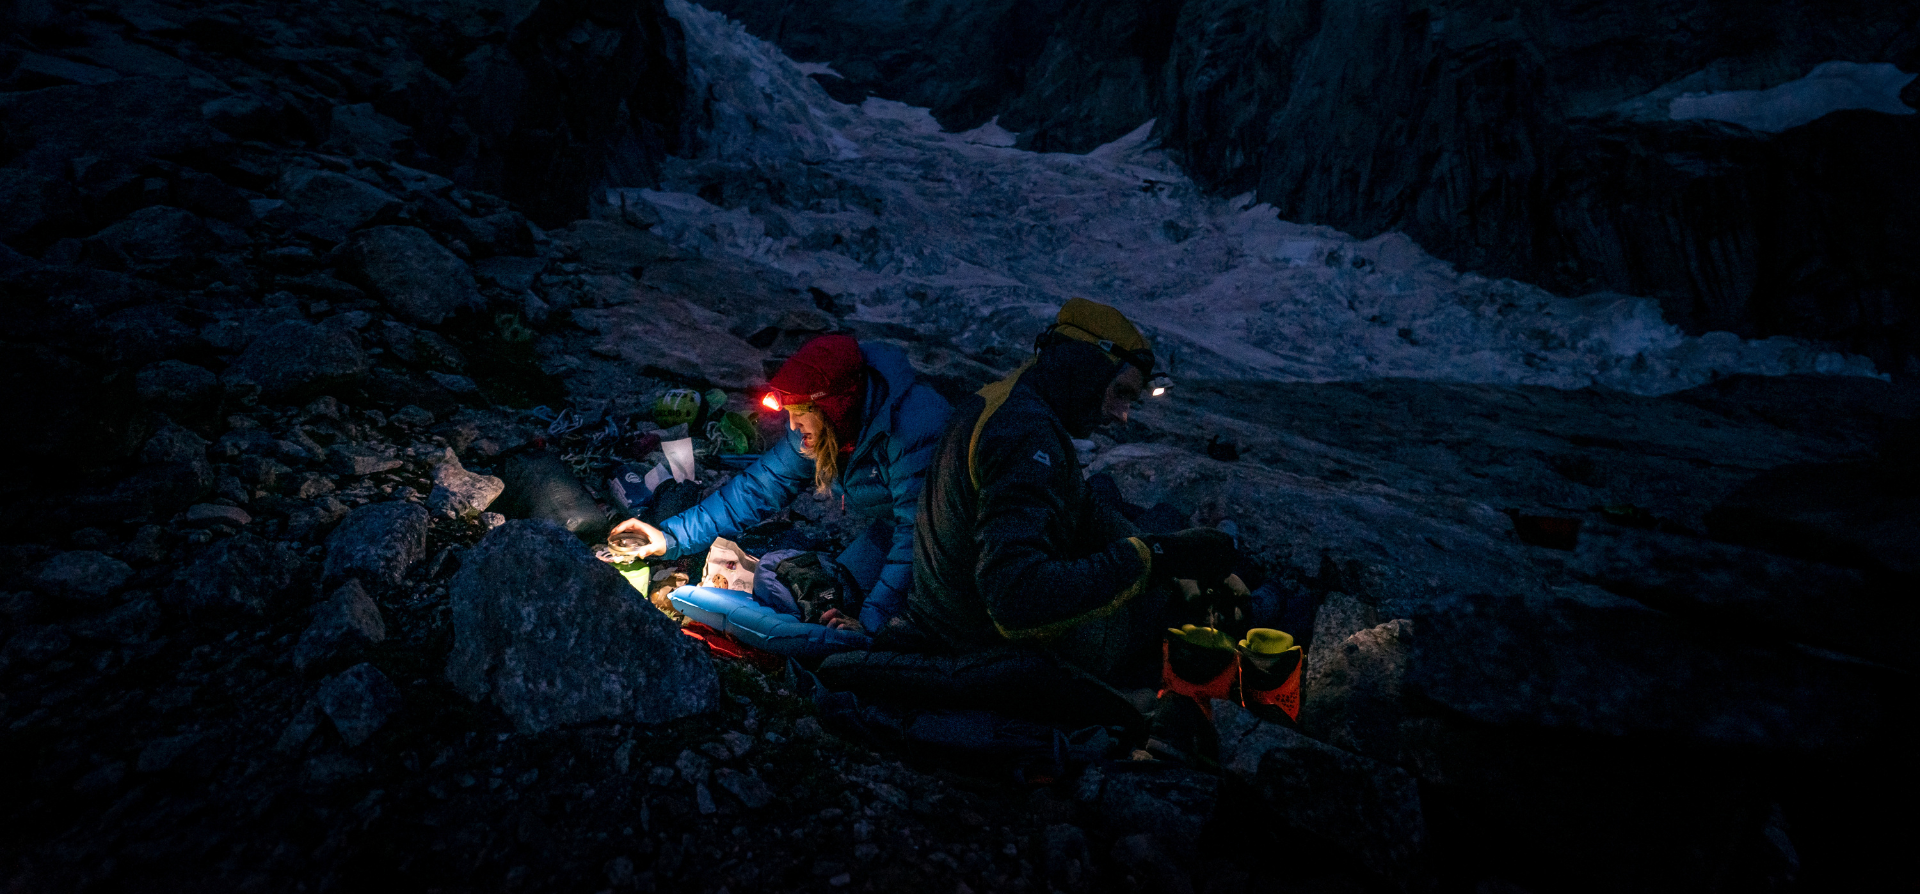
Ratti Vitali, Aguille Noire de Peuterey.

General Care
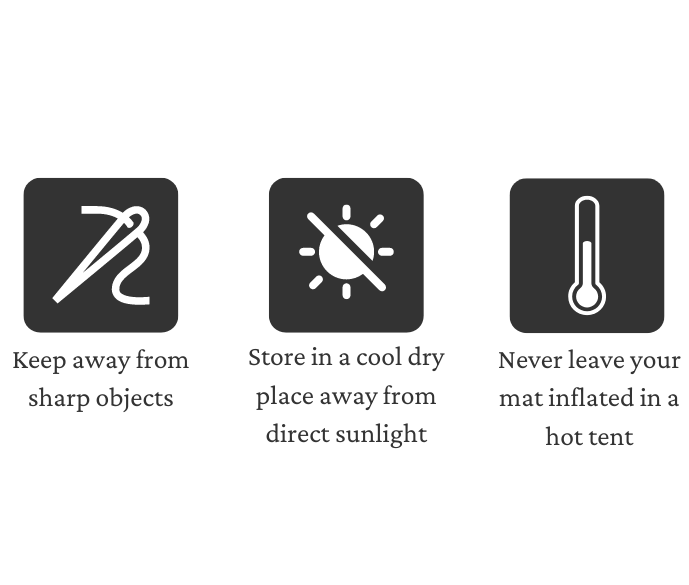
With care your sleeping mat should last many years but prevention is always better than the cure and so will last longer and perform better if cared for correctly. During use keep your mat away from sharp surfaces or objects as well as pets and always keep the valve open when not in use. After use, your sleeping mat should be dried thoroughly and stored in a cool dry place away from direct sunlight. Never leave a mat inflated in a hot tent as the rising temperature and subsequent pressure inside the mat can cause them to fail irreparably.
-
 Ratti Vitali, Aguille Noire de Peuterey.

How To Wash, Dry and Store Your Sleeping Mat
Grease and dirt from body sweat, mud and spillages can all lead to early degradation of your sleeping mat. It is therefore important to keep your mat clean.*
After use, ensure that no dirt, grit or sand is left in contact with the mat and if necessary clean the outside of your mat with a cloth or soft bristled scrubbing brush and lukewarm soapy water. Never machine wash, dry clean or tumble dry. Once thoroughly dried, check all valves and ensure they too are clean and in working order.
Where possible always store your mat uncompressed, laid flat or upright with the valve open. This will help to prevent the build up of mildew etc and minimise the risk of damage to any foam or insulated fillings inside. If necessary, air-filled mattresses (not self-inflating foam types) can be stored tightly rolled in their stuff-sack.
*You may find it beneficial to use a lightweight sleeping mat cover, sheet or separate groundsheet to protect your mat. This is especially useful if you are sleeping in the open or in direct contact with your mat.
-
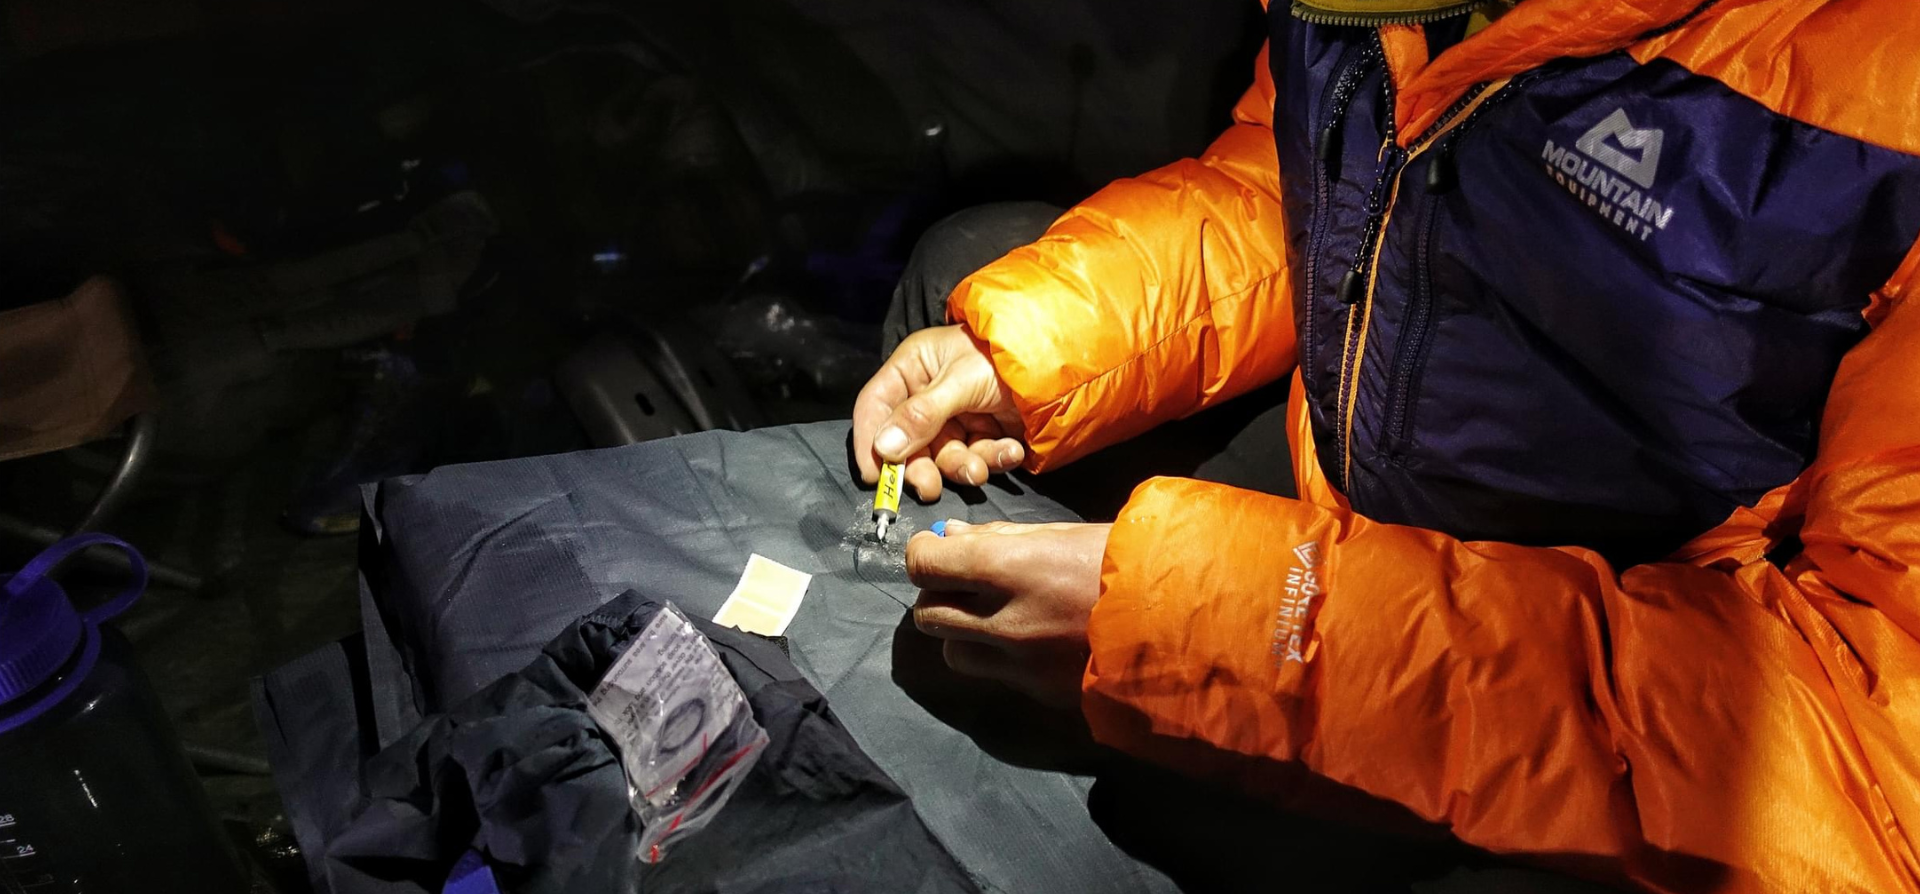 Photo by Callum Johnson

Field Repairs
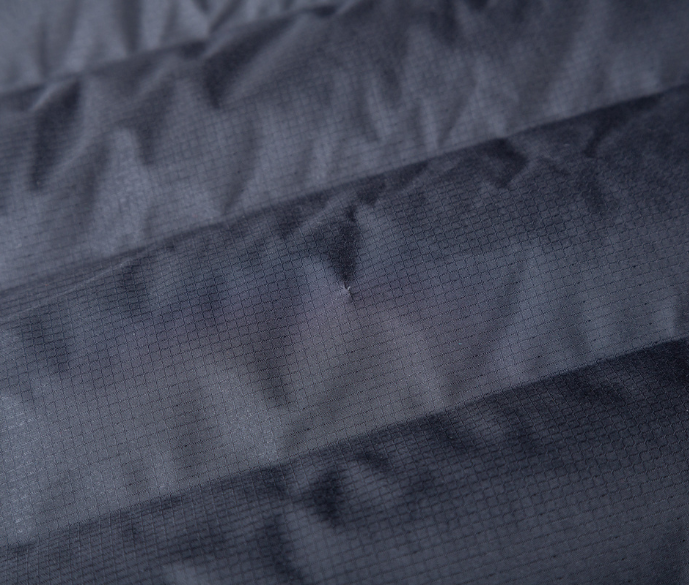
Unfortunately, even when well cared for, sleeping mats can be damaged, especially if climbing or mountaineering, leading to deflation. This can be caused by faulty or damaged valves but the major cause of deflations are punctures. These are not covered by our warranty as this is deemed normal, if unfortunate, wear and tear. Luckily most minor punctures and some valve problems can be repaired ‘in the field’.
-
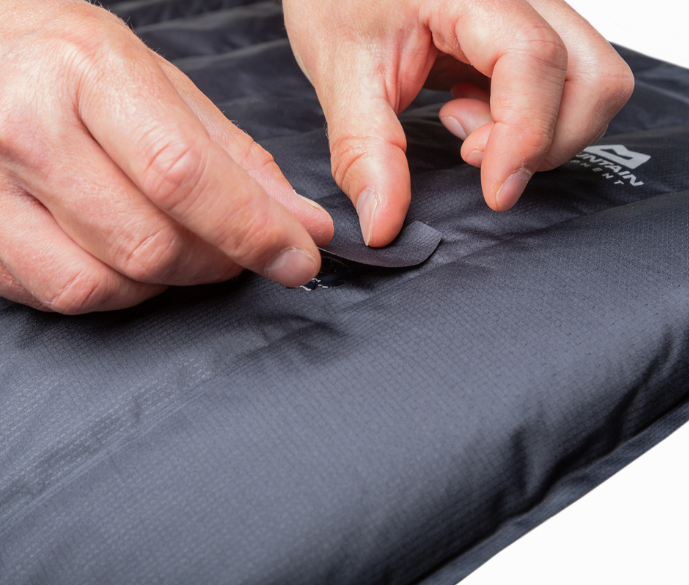
Puncture repair - Gaffa Tape / Duct Tape
Gaffa Tape or Duct tape applied over the immediate puncture may work effectively as a short-term fix. The fabric needs to be clean and dry.
-
Punctures - Tenacious Tape™ or Betrafol® Tape
Specialist repair tapes such as Tenacious Tape™ or Betrafol® Tape can also be very effective at repairing small punctures, but they do have a somewhat distinctive aesthetic. Please be aware however that such tapes, whilst extremely durable and often able to endure sustained use even at very low temperatures can leave residual marks which when taken off are near impossible to remove.
-
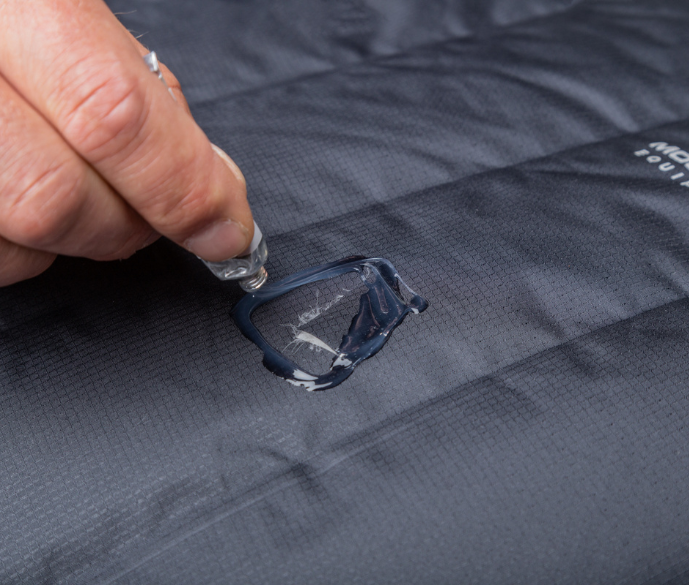
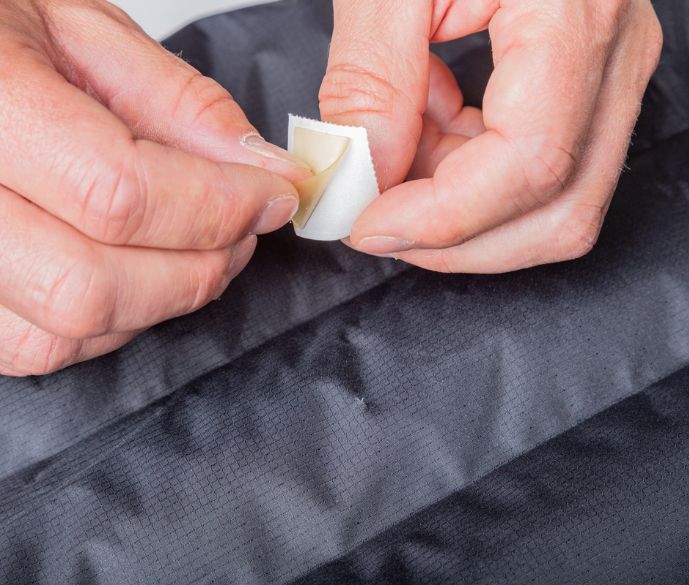
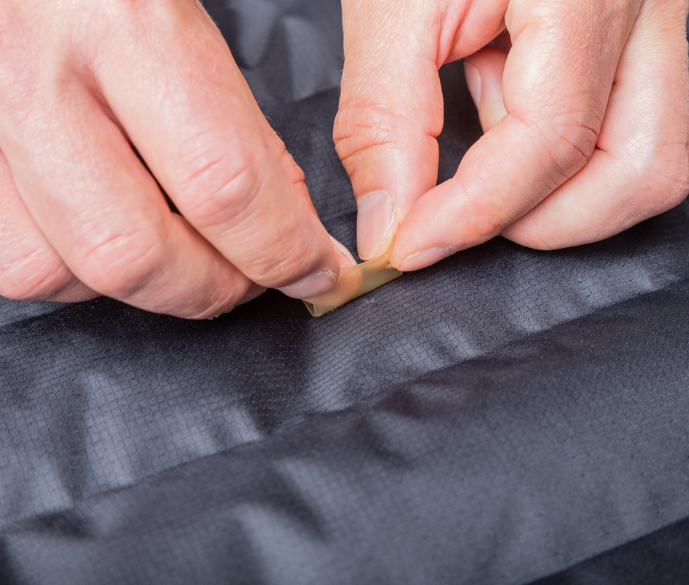
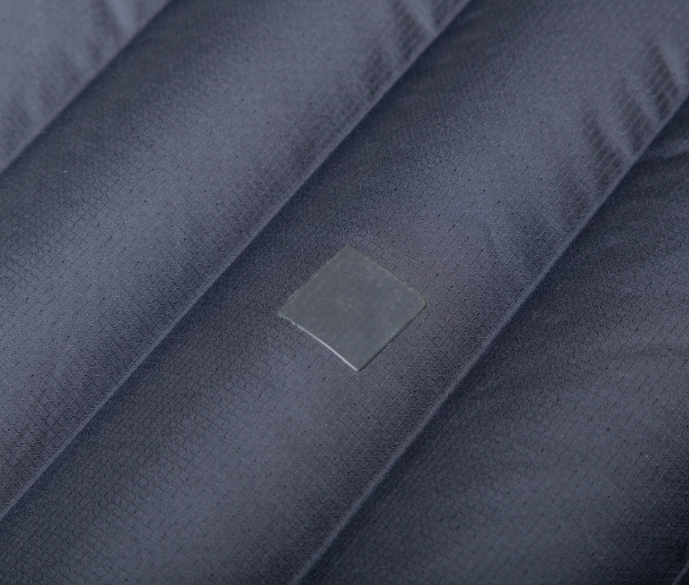
Punctures - Mat Repair Kit
Specialist repair kits which include adhesive and patches should always be carried, especially if travelling to remote regions. Correctly applied, they will provide an effective long-term fix. Here’s what to do:
1) Inflate the mattress then close the valve.
2) Apply a mix of soap and water (or just water if that’s all that’s available) to wet the entire surface of the mattress. Alternatively, if you are near a body of still water, submerge the mat. Small escaping bubbles will indicate where the puncture is. Apply pressure to the mat if you’re struggling to find the puncture(s). It is worth taking the time to do this step thoroughly and find all of the holes, which may be extremely small.
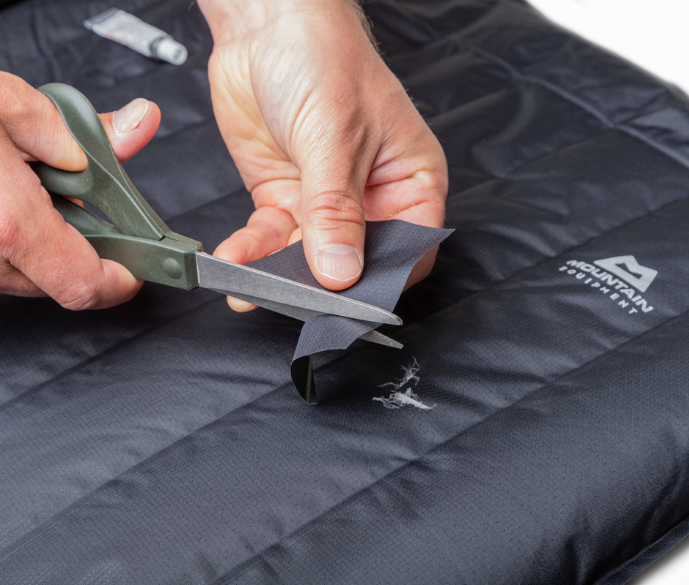
3) Note the puncture location with chalk or a felt pen and dry the area around the puncture thoroughly.
4) Open the valve to release the air, then apply adhesive to the puncture.
5) Allow the adhesive to dry thoroughly (usually around 2 hours), then inflate the mattress and examine the repair.
6) If the puncture has sealed, apply more glue to the repair patch and surrounding area to increase the durability of the repair. -
Leaking Valves - O Ring replacement (Air Filled Mats)
Air-filled mattresses with two stage valves have two O-ring seals which can perish through age or extremes of temperature or can occasionally be misplaced. These are easily replaced in the field. Two are required to provide an effective seal so ensure you are carrying replacements. Contact Us should you require more.
-
Leaking Valves - Valve Replacement (Self-Inflating Foam Mats)
If after having checked for punctures and you suspect it is the valve which is faulty, submerge the sealed valve in water and apply pressure to the mat. If you see bubbles it will need replacing. Replacement valves are not supplied as standard, so please contact us should you require one. However with the correct spare part and tools, most faulty or jammed valves can be easily replaced in around 10-15 minutes.
For repair you need: 1) The sleeping mat with broken valve; 2) A new valve (available from us); 3) Pliers; 4) Superglue
1) Grab the valve with the pliers and hold the rigid corner of the mat near the valve with your hand. Pull them apart.
2) Apply the glue on the new valve at the position marked in yellow. Use enough glue to surround the circumference of the valve but not enough to drown it. Do not apply glue to the top of the valve.
3) Insert the valve firmly into the mat and wait for the glue to dry (>1 hr). After 24 hours, test the repair.

Professional Repair
If you don’t feel confident or able to repair minor punctures yourself we may be able to help. We can also often supply many of the spare parts you may require for a do it yourself repair including repair patches, spare valves or O-rings. Please contact us for further information.
-
 Ratti Vitali, Aguille Noire de Peuterey.

End of Life
Unless your mat has delaminated, many common faults are easily fixed so do everything you can to prolong its life. Use it until it is beyond repair. Manufacturing sleeping mats, especially air-filled or self-inflating ones which are complex and involve many components and materials is very energy intensive and one of the most effective ways of reducing their environmental impact is, as strange as it may seem for us to say, to make what you buy last as long as possible and not replace it needlessly.
Here are some things you can do instead:
1) Revere it - Our products are made to be used. Learn to value the experience etched into the very fabric of your gear. Every nick, every mark is not just wear & tear but a story and a statement.
2) Revitalise it - Clean and maintain your mat when required and store appropriately.
3) Repair it - Many minor faults that may seem terminal can actually be easily fixed. It may seem expensive but think about the cost not just of a new mat but the bigger environmental cost to your consumption.
4) Relegate it - If your mat is usable but you’ve simply chosen to upgrade to the latest and greatest thing it does not mean it is not ‘good enough’ for a wide range of other uses. Perhaps it will work perfectly for car-camping or for family camping with the kids, saving your lightest mat for when it really matters.
5) Reappropriate it - Use the mat for something it was not originally designed for but works perfectly for. Keep an old mat for your dog to lie on, for padding when transporting items in your car or for your morning work-out.
6) Reassign it - Just because a mat may not meet your needs any longer it may meet someone elses. Don’t use this as an excuse to not think about your own actions (!) - but there are numerous specialist charities who need outdoor gear and many groups will gratefully receive donations of used kit. An old self-inflating mat is a lot more comfortable than a new foam mat!
7) Reuse it - The options are a little limited here but pieces of self-inflating mat can be used as kneelers for painting or planting those spring bulbs in the garden or to protect items in transit.
8) Recycle it - Recycling can save energy and resources that would otherwise be used in the manufacture of virgin materials but unfortunately the majority of mats are not readily recyclable. If you haven’t succeeded with options 1-6 the chances are your mat is going to landfill or will be incinerated.